下载 && 安装
1 | wget http://lcamtuf.coredump.cx/afl/releases/afl-latest.tgz |
安装成功
1 | root@giant:~# afl-fuzz |
有源码fuzz——upx
由于我们用afl来fuzz,这个有源码的要用afl-gcc来编译,所以编辑Makefile文件
1 | git clone https://github.com/upx/upx.git |
添加:CC = /usr/local/bin/afl-gcc (我直接在第一行加)
1 | cd ./src |
修改: CXX ?= /usr/local/bin/afl-g++ (应该在31行)
此外,我们还需要安装编译依赖的东西,github文档有说:https://github.com/upx/upx/blob/master/README.SRC
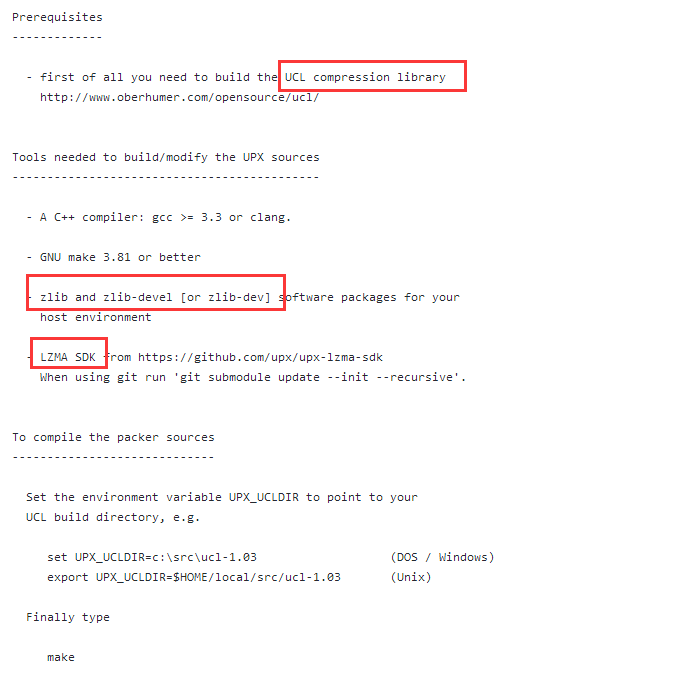
那个zlib一般都会有的,很多linux其实默认自带upx了
如果没有的话,ubuntu是这个
1 | apt install zlib1g zlib1g-dev |
安装lzma-sdk
1 | root@giant:~/aflfuzz/fuzztarget/upx# git submodule update --init --recursive |
安装ucl
1 | wget http://www.oberhumer.com/opensource/ucl/download/ucl-1.03.tar.gz |
最后到我们编译upx了
1 | root@giant:~/aflfuzz/fuzztarget/upx# make all |
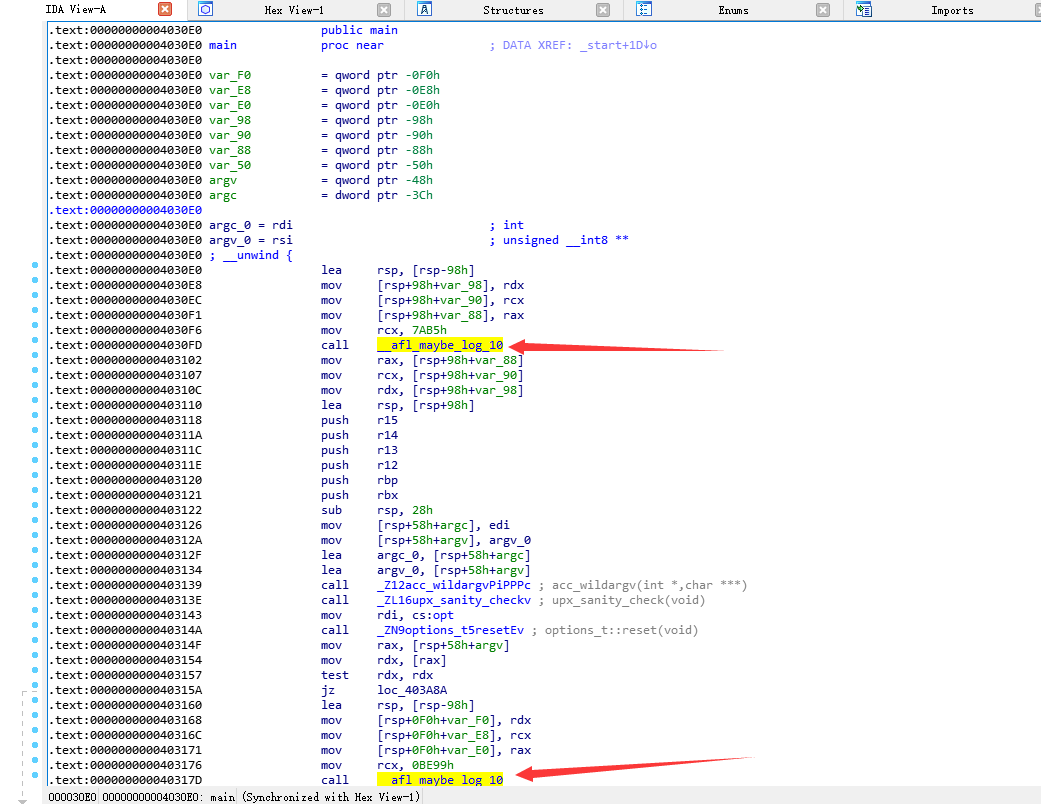
最后编译生成的文件在src目录下的upx.out
我们用ida打开就可以看到不同了
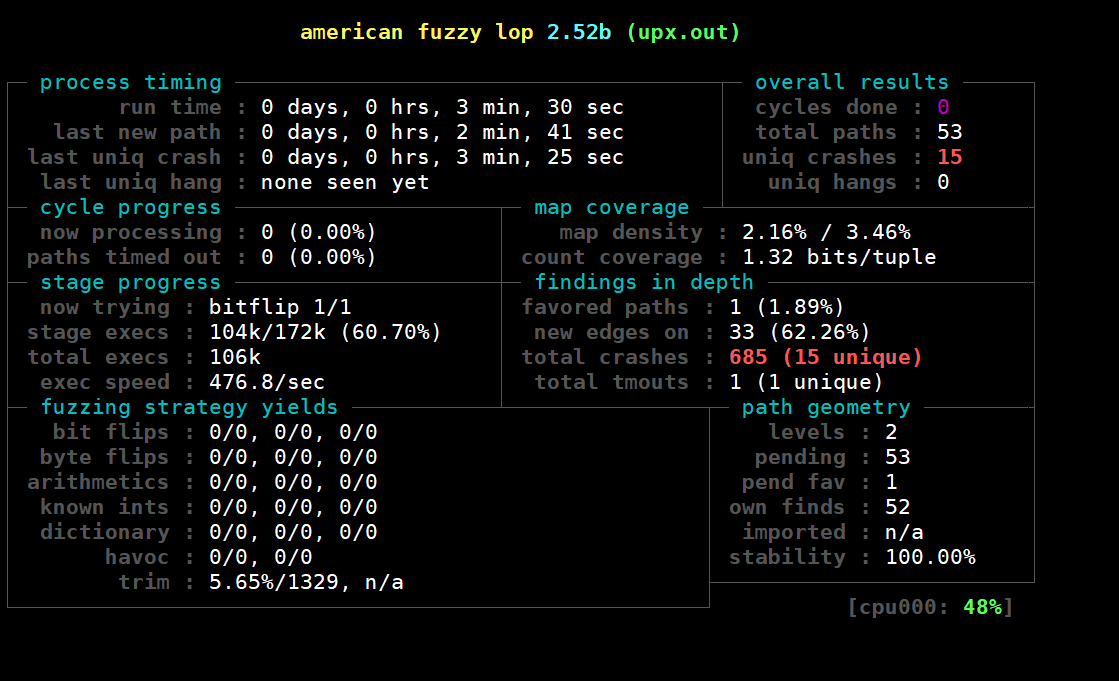
开始fuzz(下面用file文件作为样本)
1 | root@giant:~/aflfuzz/fuzztarget/upx# mkdir afl_in afl_out |
对了,还需要开启core dump
1 | echo core >/proc/sys/kernel/core_pattern |
刚开跑就15个崩溃了
无源码fuzz
对无源码的程序进行fuzz一般有两种方法:
- 对二进制文件进行插桩
- 使用-n选项进行传统的fuzz测试
第一种由afl-qemu实现,如果使用第二种方法,把-Q改成-n就行
编译一个AFL版的qemu
1 | root@giant:~/aflfuzz/afl-2.52b# cd qemu_mode/ |
如果缺少libtool
1 | apt install libtool-bin |
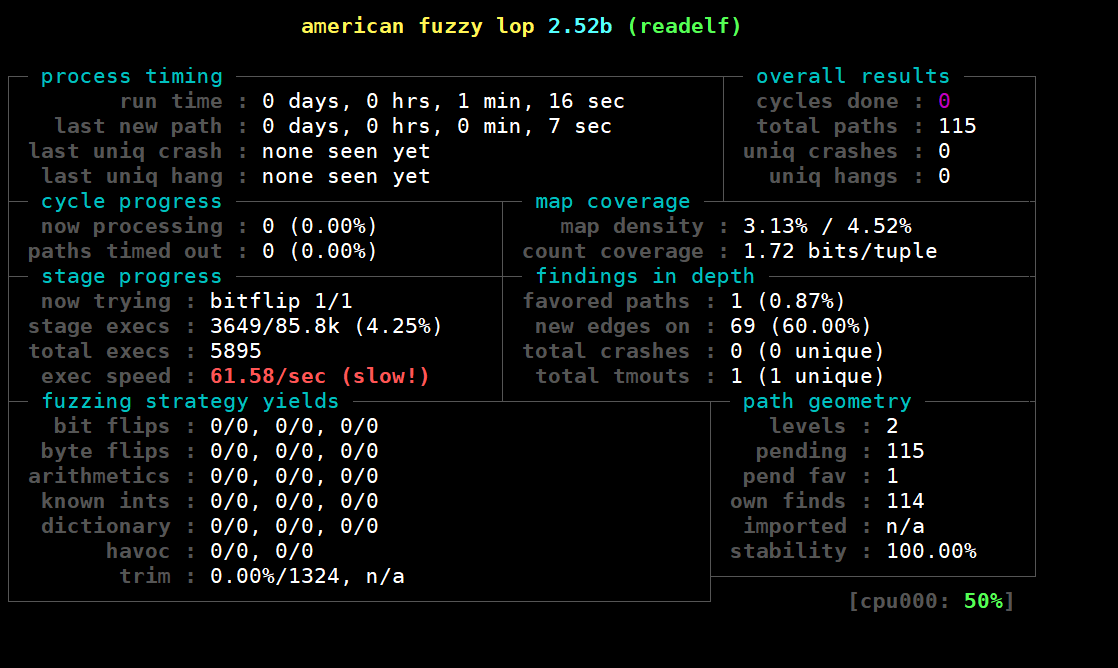
无源码fuzz —— readelf
同样也是创建文件夹,放入原始样本(test你自己准备吧)
1 | mkdir afl_in afl_out |
reference
http://pwn4.fun/2017/09/21/AFL%E6%8A%80%E6%9C%AF%E4%BB%8B%E7%BB%8D/
https://www.cnblogs.com/WangAoBo/p/8280352.html